DMW E Registration Portal, Login onlineservices.dmw.gov.ph
Read the complete details about How to Register For DMW E Registration Portal, Login onlineservices.dmw.gov.ph Given Here.
You must create an account on the POEA online Portal eRegistration website if you’re a Filipino who wants to work overseas. We outline the procedures for registering with POEA in this page. We also provide instructions, prerequisites, and responses to frequently asked questions concerning the process.
The POEA eRegistration portal is comparable to online résumé uploading, to give you an idea. Your personal information, educational and training background, employment history, and other crucial information will be requested of you. You will be able to apply for open positions once you have successfully completed the registration process.
Since this is the Philippine agency that manages job placements for overseas employment, Filipinos who intend to work abroad must do so through the Philippine Overseas Employment Administration (POEA). Additionally, you must register for POEA Online Services on the website.
To begin the registration procedure, go to the POEA website at www.poea.gov.ph and select “Online Services” near the top of the page.
DMW E Registration Portal
Having trouble processing your plans to travel abroad? Uncertain of the first step to take on the POEA’s electronic registration portal? Here is a starter guide to help you on your way to becoming an OFW. Let us know about the POEA E-Registration first, though.

When you travel abroad, you must basically have your own POEA account, which may be done online. As this would be paperless, it will be quicker and simpler for individuals interested to acquire their job orders. The new procedure is known as e-registration and calls for online registration from both the business and the employee.
Details about POEM DMW E Registration Portal
An organisation called the Philippine Overseas Employment Administration (POEA) works to uphold the rights of OFWs and safeguard their safety while working abroad. In order to raise the standard of services provided to OFWs, it also aims to verify employment agencies’ adherence to legal requirements.
One method the POEA does this is by mandating that all people applying for jobs overseas register and set up accounts on its eRegistration portal. As a result, it is simpler for them to evaluate each applicant’s qualifications when a position opens up because they have a full profile of each one.
Qatar Expo Volunteer Registration
How to Register For DMW E Registration?
Workers who want to work overseas can submit information using the POEA e-Registration System. To be eligible to apply for a job abroad, every OFW must first register on the website. Applicants will be given a registration number once the registration procedure is finished.
Requirement
- Active email address
- Mobile phone/Laptop/Desktop Computer
- Internet connection
Documents List
- 2×2 Profile Picture/ID Picture (2MB or less)
- Certificates/Educational Certificates/ Training Certificates
- NBI clearance
- Medical certificate
- Valid IDs
- Passport
- SSS ID
- OWWA ID or OFW e-Card
- TESDA ID
- Seaman’s Book (SIRB)
- PhilHealth ID
- Pag-IBIG
- UMID
DMW E Registration Qualification
If you’re wondering who needs to apply for the eRegistration portal, this portal is open to all Filipinos who are seeking to work overseas as well as to those OFW who are returning to their home countries. Every potential OFW is required to have a profile on the website.
Steps For Sign Up For DMW E Registration onlineservices.dmw.gov.ph
These are the detailed instructions for using POEA e-Registration. Please adhere to the advice below:
- Account Creation and Registration
Accessing the website is the first step. Click here to access the POEA Online Services webpage. - To view this page, click this link.
- You should read the terms of use and privacy policy before entering the information. Simply press “I Accept the Terms of Use.”
- Your name, gender, email address, birthdate, passport number, and expiration date are among the personal information you should enter. Click Register after providing your personal information.
- Your account will be created as a “SUCCESS” when you successfully register, and the login information will be given to your email.
- Check your inbox by logging into your email account. Check your spam folder if you didn’t get the email in your inbox.
- The initial password and confirmation of a successful registration are both included in the email. Log in with the password. Finally, you have
Reminder: After using the temporary password to access the portal, you will be prompted to change it to your own unique password. You can now access the portal with your own account and password after the adjustments have been made.
Have to Upload your Photo and Passport
You will be prompted to add your profile photo and passport information after logging in. For the photo upload box to appear, attach your profile picture. Then select your photo as your profile picture by clicking Choose File. Next, select Upload. The image must be 22 in size, clear, and under 2MB in size.
You can secure an online copy of your passport after uploading your photo (just take a photograph of it and make sure it’s clear), and you can then upload the passport in the necessary attachment.
Now Edit Your Profile
Click “My Profile” on the left, just below the Dashboard. Enter the necessary data. After that, click “Add New Identification” to submit the information from your legitimate ID. The type of ID, ID number, date of issuance, and expiration date are all included.
Click “Add Beneficiary” to specify the beneficiary. Enter their private information, then click “Save” to complete.
Kindly Update Education Details
By entering your experiences, credentials, and other information, you can also update your education and training records. Four categories—Educational Attainment, Certificates, Trainings, and Language—are used to organise the My Education tab.
Choosing “Add Education” You must encrypt information about your education, like your grade point average, graduation year, and schools you’ve attended. If you discover the school in the list provided, provide the information in the “Others” field. Select “Save” from the menu.
In the “Add Certificates” area, which is located immediately below “Educational Attainment,” you can upload any certificates you may have. Enter the certificate’s information by clicking “Add Certificate” in the dialogue box. Enter the title, number, issue and expiration dates, hours completed, name of the issuing organisation, and competency for the certificate. Then click “Save” to continue.
If you have any training certificates, click the “Add Training” button to submit the information from them. Include the name of the training, the certificate number, the length, the skills learned, and the training institution’s name in the encryption. Hit “Save” after that.
Finally, click “Add Language”. On a scale of 0 to 10, rank your level of fluency in the language you know. Press the “Save” key.
Add Work Information
It’s time to add your professional experience and credentials. The settings will appear when you select the “My Experience” tab.
“Add Preference” should be clicked. Select the category: land-based or water-based. Then, enter the desired work into the position of the Search Toolbar and press search.
Work listings that correspond to the keyword will be shown. To select, click “Select”. Choose the sector, preferable nation, and category. Select “Save” from the menu.
To add job experience and information, click “Add Experience”. Enter the company name, position title, start date, and nation. Check your current position whether you are still employed by this business. Select “Save” from the menu.
Upload Other Documents
You will be required to upload your documents, which include your police clearance, NBI clearance, and medical certificate.
Select “My Documents” from the menu. The “Add Document” button will appear after that. Toggle it.
Click “Document Type” after selecting “Add Document”. Add the issuer and the expiration date. To add the document, click “Save”.
Print Resume
You are now prepared to view and print your POEA resume after entering all of your information.
Simply select “My Resume” to generate an information sheet. If you desired a hard copy of your resume, select “Print Resume”.
You can view and print your résumé at this point. To view your Worker’s Information Sheet, simply click “My Resume”. If a tangible copy of this is what you wanted, click “Print Resume.”
You are now one of the registered members who will be given consideration for POEA jobs after finishing everything.
POEA e Registration
The internet registration platform for POEA is currently on its second iteration. The initial one had a few problems and flaws that caused the website to frequently crash. The processing through this new site is substantially more convenient and user-friendly. A computer or mobile device can now be used to register online.
Here is the warning sent by POEA regarding Version 2.0 of the online service portal aimed at all authorised land-based and staffing firms, as well as applicants and workers from outside Filipino countries.
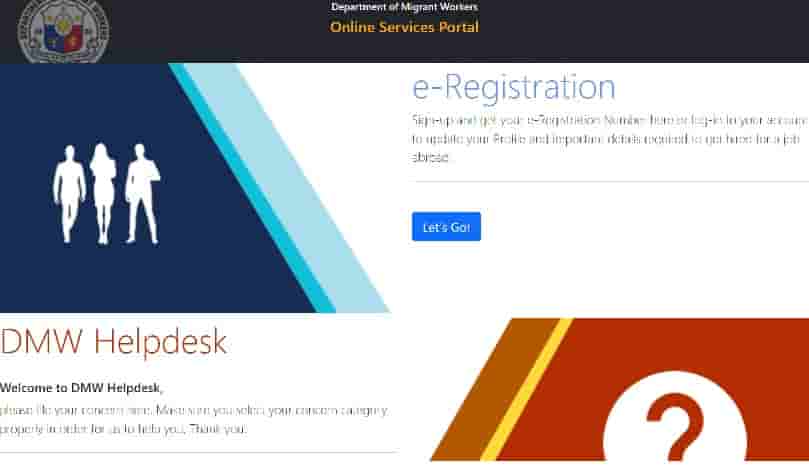
DMW E Registration Login onlineservices.dmw.gov.ph
E-registration log-ins were introduced in 2019 in an effort to streamline the procedure for both companies and employees. However, the system had some issues because the website kept crashing. The new portal is much more user-friendly and convenient for registration.
A screenshot of the login page where you must input your username (email) and password is shown below:
You would now be able to easily log in to the website and access your POEA profile after updating your password and email.
No, simply leave it empty.
Create a.jpeg or.jpg file from a photo you have. Select the saved image by clicking “Add File” and then.
Request assistance from your organisation.
Visit the POEA office that is the closest to you.
Contact the POEA help desk through email.